Installing a rooftop solar system is a big decision for many Indian homeowners. People want to understand how the process works, what steps are involved, and how long it takes to get a working system on their roof. Clear information makes the entire journey easier and helps homeowners feel confident about shifting to solar.
Before taking the first step, it is important to understand how the process moves from the first site assessment to the final grid connection. Here, we explain each stage of installation to make your decision easier and well-informed.
-
- Initial Site Assessment and FeasibilityThe process begins with a site survey. The installation team checks your roof for size, strength, orientation and shading. We measure whether the roof can hold solar panels and note sun exposure and possible shadows. We also examine existing electrical wiring and the distance to the main panel and meter. This step helps to ensure safety and good performance.Usually, the installer will also calculate your electricity needs based on past bills. This helps to determine the capacity of the system you need, which is a crucial factor in a proper design.

- System Design and Quotation
Once the survey is done, the vendor prepares a custom design and sends you a quotation. The design includes panel layout, inverter type, wiring plan, structural mounting details and cost estimates. This step helps you see what you will pay and what you will get.
You also choose whether you want a standard on-grid set-up or a hybrid/off-grid system, depending on backup needs. Good installers explain the different options under solar rooftop solutions. - Government Approvals and Subsidy / Net-Metering Application
If you go for grid-connected rooftop solar, you must apply for technical feasibility approval from your local electricity DISCOM. Many homeowners do this online via the national rooftop solar portal.
Once DISCOM approves, you may also apply for any available subsidy under national schemes. Using an approved vendor helps ensure compliance. Some states may require permission from the building or society. A reliable installation company will help you manage that paperwork. - Mounting Structure & Panel Installation
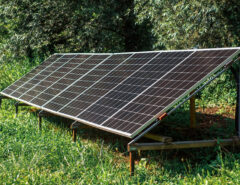
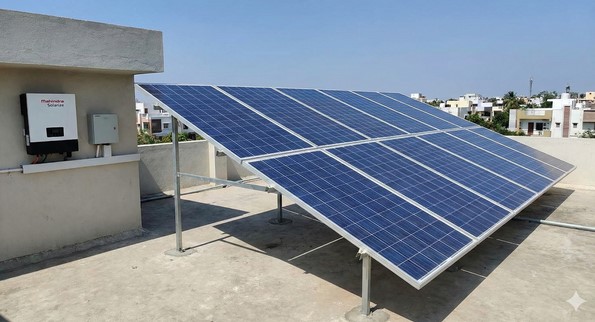
After approvals and documentation are complete, the installation begins. Workers install the mounting structure on the roof. We ensure the structure is strong, corrosion-resistant and correctly angled for optimal sunlight exposure.
Then, solar panels are carefully placed and secured on the structure. Installers use appropriate weatherproof connectors and ensure safe spacing for ventilation and thermal expansion. - Electrical Wiring, Inverter Installation & Earthing
After panels go up, technicians connect them using DC cables to the inverter. The inverter converts solar DC power into AC power for your home. Then AC wiring links the inverter output to your home’s distribution board.
The installation includes proper earthing, surge protection and safety wiring. Good wiring and safety measures are vital to prevent hazards and ensure long life. - Inspection, Commissioning & Grid Connection
Once physical installation and wiring are complete, your installer informs the DISCOM. The electricity department performs a final inspection. If all norms are met, we install a bi-directional net meter. This net meter records the electricity you draw from the grid and the electricity you export to the grid.
After DISCOM approves, we activate your solar rooftop system. At this point, your system starts supplying electricity to your home. It will send the surplus to the grid if generation exceeds usage. - Monitoring and Maintenance
Even though solar panels require little upkeep, periodic monitoring and maintenance help keep performance high. Installers often provide a monitoring system (some via mobile apps) to track power generation and detect issues.
You should clean panels regularly because dust or bird droppings can reduce efficiency. In addition, you should inspect wiring or bolts. Many providers offer annual maintenance services for safety and long life.
- Initial Site Assessment and FeasibilityThe process begins with a site survey. The installation team checks your roof for size, strength, orientation and shading. We measure whether the roof can hold solar panels and note sun exposure and possible shadows. We also examine existing electrical wiring and the distance to the main panel and meter. This step helps to ensure safety and good performance.Usually, the installer will also calculate your electricity needs based on past bills. This helps to determine the capacity of the system you need, which is a crucial factor in a proper design.
Why Choosing the Right Solar EPC Company Matters
The steps above can work well only if the installer follows good practices and uses certified components. A reputable solar EPC company handles design, approvals, installation, wiring, safety and after-sales support. This ensures that your system performs well for decades.
This is especially important with solar rooftop solutions due to grid connection, net-metering, subsidy paperwork and technical standards. A trusted company reduces your stress and risk.
A Trusted Partner for Your Rooftop Solar Journey
When you choose Mahindra Solarize, you partner with one of India’s leading solar EPC companies. Mahindra Solarize offers end-to-end solar rooftop solutions, from initial site survey and expert design to installation, net-metering support, commissioning and after-sales service. We use high-quality components, follow safety standards, and manage documentation for subsidies or grid connections.
With Mahindra Solarize, you get reliable installation, a transparent process and dependable support. We help you adopt rooftop solar without hassle.
Installing a rooftop solar system in India involves several clear steps: survey and design, approvals and net-metering application, panel mounting, wiring and safety setup, grid connection and maintenance.
By opting for a competent solar EPC company like Mahindra Solarize and following the steps carefully, you can turn your roof into a clean energy source. With growing awareness and supportive government policies, rooftop solar may become a standard choice for many Indian homes. Solar panels are ideal for families seeking reliable, cost-effective and sustainable electricity.
#rooftop solar #solar rooftop solutions